Translate

Wednesday, March 29, 2017

Man of Numbers


Hello, lovely friends! I hope you're having a beautiful week. All is well here. I'm quite busy in my craft room, which means I'm having the time of my life! 

We're launching a fabulous new challenge at The Frilly and Funkie Blog! The talented Jenny is our hostess with the theme of 'Count Me In'. Her guidelines are as follows: For this challenge you need to use your choice of numbers to add that special 'sum-thing' to your vintage or shabby chic project. Make them count as part of the design, not just a last minute addition!  


At the end of the challenge the team will choose their top four picks. Our first place winner will be invited to join us in a Guest DT spot at The Frilly and Funkie Blog. Three additional talented participants will receive badges to display on their blogs. Everyone who enters and adheres to the challenge guidelines will be entered into a drawing to win a $25 spending spree at The Funkie Junkie Boutique! For entry specifics and inspiration from my fabulous teammates just click on the blog link above. 


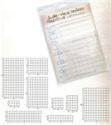
I happen to have my own very special 'man of numbers'. My son, Patrick, has loved numbers for as long as I can remember (primes are his favorite!). He's graduating this May (summa cum laude) with degrees in both Mathematics and Computer Engineering. In the fall he's off to begin a phd program in a very specialized area of number theory that I have absolutely no understanding of, but needless to say I am beyond proud of him. Today's card is for Patrick. You won't find a bow or flower anywhere on this card, but there are numbers everywhere you look.   


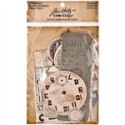
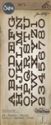
2017 is die cut from a Tim Holtz set and prominently featured as his graduation year. Of course, it wouldn't be a 'Patrick card' if it didn't have pi on it. I stamped each number separately using a Tim Holtz collage stamp. The point mark is simply the end of my pen dipped in ink. 

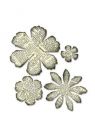
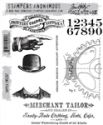
I also used a Wendy Vecchi stamp in each corner to give the card a more masculine look. 


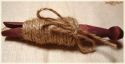
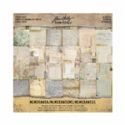
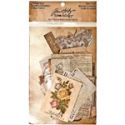
The embellishments are from Tim Holtz Ephemera packs. The 'traveler' embellishments and clock hands are an inside joke between me and Patrick. He also studies theoretical physics, and I continually ask him to invent a time machine so we can get a close up view of history. 


Thank you so much for being here with me today! I hope you're heading to your craft room to create your own 'number' themed challenge project. I send wishes for all things good and wonderful!

Hugs,

Tuesday, March 21, 2017

An Easter Garden!


 Hello, friends! I hope you're enjoying a lovely day. I'm relishing the beautiful weather and staying busy as ever in my craft room with my Easter preparations. I'm thrilled to be presenting on the Maja Design Blog today. I have a new card to share, once again featuring my embellished Easter eggs and two styles of handmade flowers.  

Two of my favorite Maja Design collections, Vintage Autumn Basics and Vintage Summer Basics, are used in the creation of this card. As usual, the paper is distressed, layered and stitched to form a base. One of the many things I adore about Maja Design paper is the way it behaves much like fabric when I'm working with it. As you can see, I really put it to the test and it holds up every time.


You'll find a blooming rose and a wildflower gracing my little garden. The link for the Easter egg tutorial can be found here, the wildflower tutorial can be found here, and the blooming rose tutorial can be found here, if you'd like to add them to your own creations.  

Design paper is border punched and layered to anchor the egg and florals. A die cut Spellbinder's frame is tucked in behind the egg. A die cut flourish, ribbon and cheesecloth add a soft touch.


Thank you so much for visiting! If you love Maja Design Papers but don't know where to find them, you can locate the store finder here. Don't forget to check out the March Mood Board if you haven't already done so. There's still time to get your project entered. Sending wishes for sunny days filled with many joys!

Hugs, 

Nancy-sign


 Vintage-Summer-Basics3

Additional Supplies: Martha Stewart Lace Border Punch, Sentiment Stamp, Archival Ink, Tim Holtz Tattered Florals Dies, Magnolia Rose Leaf Die, Flourish Die, Spellbinders Frame Die, Foam Adhesive, Button, Lace, Cheesecloth, Sewing Machine, Thread. 

Did you know Maja Design is on Social Media?

Pinterest: Did you know that Maja Design has a Pinterest Page? You can find it right here.
Facebook: You can follow us on Facebook right here and of course "LIKE" us.
Instagram: Maja also has an Instagram account – majadesigninsweden.
(Use the hashtag #majadesigninsweden or the tag @majadesigninsweden
with your Maja papers so we can find you.)


Wednesday, March 15, 2017

Easter Bunny Blessings!


Hello, beautiful friends! How are you doing today? I hope all is well in your corner of the world. I'm looking out at a lovely sunny day with signs of spring all around. I know Louis Armstrong said this first, but it's a wonderful world! 

It's time for a super fun, new challenge at The Frilly and Funkie Blog! The completely amazing Kathy is our hostess with the theme of You've Got to Know When to Fold 'Em. Her guidelines are as follows: this challenge is all about using folded paper in a way that goes beyond just folding it in half. Create a vintage or shabby chic project that uses folded paper in a way that elevates the design. You can make a fancy fold card, or add folded embellishments to a card or layout.

At the end of the challenge the team will choose their top four picks. Our first place winner will be invited to join us in a Guest DT spot at The Frilly and Funkie Blog. Three additional talented participants will receive badges to display on their blogs. Everyone who enters and adheres to the challenge guidelines will be entered into a drawing to win a $25 spending spree at The Funkie Junkie Boutique! For entry specifics and inspiration from my fabulous teammates just click on the blog link above. 

I'm having a great deal of fun with this theme. I'm still assembling my Easter cards, so I'm using one of my handmade eggs and wildflowers as an accent. The link for the Easter egg tutorial can be found here and the wildflower tutorial can be found here if you'd like to give them a try. 


The little pocket above is folded from chipboard and covered in design paper. Wendy Vecchi's mat minis add some flowery cheer. The pocket is perfectly sized to hold a bit of chocolate from the Easter bunny. No need to raid the children's Easter baskets once they're off to bed--or am I the only one guilty of doing that? I can also see these as place cards for the dinner table, just switch up the sentiment stamp with the names of your guests. These eggs are really versatile!

My family tradition is to have a place card and some type of favor with a sweet treat for each person present at a special meal. I feel it's a lovely formality that's quickly becoming a thing of the past, and I intend to do something about it.       


The ruffle trim in the above photo is border punched and hand folded using design paper. It's a fun and simple embellishment to add a feminine touch to any design. 

Below is a close up of an egg with a wildflower.  


Thank you so much for sharing your time with me! Now it's time for you to start folding, and by that I'm referring to paper, NOT laundry (we all do enough of that). May your day be filled with joy and your heart with happiness!  

Hugs,