Translate

Friday, July 31, 2015

Southern Fresh Peach Cobbler


Hello, friends! Happy Friday! I can't remember the last time I posted a recipe. With peaches at the height of their season, I wanted to share this southern favorite. It's origins are humble, preparation is simple, and every scrumptious bite screams summer!

I joined a CSA (Community Supported Agriculture) group for the first time this summer. Each week a bounty of locally grown produce is delivered right to my doorstep. Among the fresh offerings are the sweetest, most succulent South Carolina peaches we have ever tasted. I order extra so we have plenty for snacking and baking. This week I used my extra pounds of peaches to whip up a traditional Southern Peach Cobbler.  


Words truly can't describe the mouthwatering aroma of this luscious cobbler as it bakes in the oven. The batter crust comes out sweet and tender, with just the right balance of peaches to crust. It gets the empty pan award in our home, as there are never leftovers at the end of the day.  

Thanks for stopping by today! I hope you'll enjoy this as much as we do. May your day be filled with all things good and wonderful!

Hugs,         

Southern Peach Cobbler

4 cups of fresh, ripe peaches (I used 6 medium to large ripe peaches)
1/4 ~ 1/2 cup granulated sugar, depending on sweetness of peaches
1 cup self rising flour
1 cup granulated sugar
1/3 cup melted butter
1/2 cup milk
1 egg

Preheat oven to 325 degrees. Butter a 2 quart baking dish. Cut a shallow 'X' through the skin at the base of each peach. Blanch peaches in boiling water for 40 seconds each, place immediately in an ice water bath, then remove skins. Coarsely chop peaches and place in buttered baking dish. Sprinkle 1/4 ~ 1/2 cup granulated sugar over top of the peaches.

Whisk together flour and 1 cup sugar. Whisk together butter, milk, and egg; add to dry ingredients, folding gently until moistened and combined. Spread batter over peaches. Bake uncovered at 325 degrees for approximately 50 minutes, until golden brown and firm in the center. Baking time depends greatly on your oven. Mine is older and tends to run a bit hot. 

Serve this warm with a scoop of vanilla ice cream for a heavenly treat!


Wednesday, July 29, 2015

Butterfly Card


Hello to all on this lovely day! It's Wednesday. My favorite day of the week! Every Wednesday I have the honor of giving tours of the Nathaniel Russell House, and sharing my love of Charleston's history with guests from around the world.


Another reason I love Wednesday is because it's the day we launch our new challenge at the Frilly and Funkie Blog! Cec is our hostess and she has chosen Things With Wings as our theme for the next two weeks. Use anything with wings as the focal point of your vintage or shabby chic projects, be it of the animal, fantasy or mechanical variety. We want your creativity to take flight! We're hoping you'll head straight to your craft rooms and play along with us! For full challenge details and exciting prize information simply click on the link above.


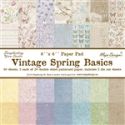
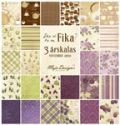
My winged creatures of choice are butterflies. I love them. I began by layering and distressing Maja Design papers from the Vintage Spring Basics and Fika collections. The circle layers were cut with a Spellbinder's die, then cut in half and staggered in the center of the card.


My mind's eye envisioned a butterfly garden, so a flourish of summer blooms was a must. Some of the floral components are handmade and stained, while others are from an old Prima collection that has been languishing in my flower baskets. The butterflies were die cut using a Tim Holtz die.


The sentiment was stamped using a selection from my rubber stamp collection. 


I have a large stash of pearls and twine that I keep in a basket on my craft desk. I love them. I can never resist the urge to add them as finishing touches on my projects.


Thank you for dropping in to share in the crafty fun! May your day be filled with beauty, joy, and love!  

 
I have entered my card in the following challenges:
All Sorts Challenge - Add a Butterfly
Fussy and Fancy Challenge - Things with Wings
Fan-Tastic Tuesday - Anything Goes, Make it Feminine
613 Ave Create - Anything Goes, Shabby Chic
Glitter n Sparkle Challenge - Anything that starts with a 'B' (butterflies)
Top Tip Tuesday - Bingo Challenge (pearls, sentiment, flowers)
Let's Craft and Create - Butterflies or Birds
Crafting from the Heart - Anything Goes
Love to Scrap Challenge - Anything Goes
Studio 75 Challenge - Add a Butterfly

Wednesday, July 15, 2015

Sympathy Card


Happy Wednesday! I hope your day is off to a great start. We're still trying to beat the heat and humidity in Charleston, but that's expected in July. I didn't expect what I encountered on my front porch when I was watering flowers a couple of days ago. I caught a flash of red and a tattered looking web at about waist height. I almost walked right into a black widow spider who placed her web between one of my window boxes and a rocking chair! The red hour glass marking was so defined it could have been taken straight out of a textbook photo. Needless to say, the exterminator made an extra visit to our home this month.      

Today begins a brand new challenge the Frilly and Funkie Blog! Pamellia is our hostess, and her guidelines for the next two weeks are to Raise it Up! She wants to see lots of layers, panels, and/or elements on your shabby chic or vintage project, BUT they must be raised up! Whether you choose pop dots, foam squares, silicone glue or another means of support, make sure they stand proud. We're hoping everyone will play along with us! For full challenge details and prize information simply click on the link above.


Sadly, I am in need of a sympathy card for a dear friend who lost her mother not long after my own sweet mom passed. I want give her something more meaningful than a store bought card. 

I chose a palette of soft blues and neutral tones, distressing and layering papers from Maja's Vintage Summer Basics collection. I concocted a mixture of Tim Holtz Distress Stains to color the roses. All of the layers are popped up with foam tape. This is a really chunky card!      


The trio of tags are courtesy of the Tim Holtz Tag Collection die set. It's difficult to discern in the photos, but the center tag has a pocket to hold the vintage image I used as a focal point. Each tag is tied off with ivory twine. I found the image of the praying children on the internet and printed it from my computer. 


I found the perfect sentiment in my stash of stamps. My stamp collection is slowly taking over our home. I should stop buying them, but somehow they always find their way in my cart. A scattering of white pearls was the finishing touch to the card.   


I hope you'll find time to join us at the Frilly and Funkie Challenge! I send warm wishes and lots of love to all my crafty friends. Thank you so much for taking a peek at my card!

Hugs,


I have also entered my card in the following challenges:
Creative Craft Cottage - Layer it up
Fab n Funky Challenge - Flower Delights
Inspiration Destination Challenge Blog - Anything goes
Simon Says Stamp Monday Challenge - Anything goes
Creative Moments - Anything goes/Monochromatic
Card Mania Challenge - Anything goes
Story Teller
Crafty Friends Challenge Blog - Anything goesWord Art Wednesday - Anything goes/Family Friendly
TTCRD - Anything goes