

Hello dear friends! The end of the week has arrived, bringing with it the Frilly and Funkie Friday Focus. I'm incredibly excited to be presenting this week because the focus is on one of my favorite products, Maja Design Papers. Remember, this also means Linda will be offering a 15% discount on all Maja papers this week at the Funkie Junkie Boutique. That's enough to have me jumping for joy!
I thought long and hard about how I could introduce these papers to those of you who might not be familiar with them. I decided on a tutorial for these layered paper flowers. I make these often because of their simplicity and romantic, shabby appeal. I also enjoy the freedom of choosing colors and patterns to coordinate specifically with my project.
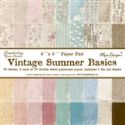
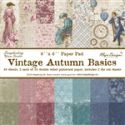
I made two sets of flowers. One showcases Vintage Autumn Basics, the other Vintage Summer Basics. This way you can compare the two lines and their amazing scope of color and designs.

The above flowers were created with Vintage Autumn Basics. The flowers below were made with Vintage Summer Basics.

The first step is to die cut or punch 6 five petal flowers. I used a Spellbinders die because the size was right for my project, but you can use anything you like. Cut 1 large petal, 3 medium petals, and two small petals.

The next step is to lightly moisten your small petals with water. Shape one of them as pictured below to for the base of your center bud. The second small petal should just be squished together. It is going to become the center of the bud. For petal shaping I use a tool kit and shaping mat from Susan's Garden. You can find similar tools and mats in other brands. You can even use a mouse pad!


Now that your bud is shaped it's time to to move on to your larger petals. Moisten them all lightly with water then gently scrunch and twist them into something that resembles the photo below. It seems like this would tear them apart, but it doesn't. Maja papers are strong.


After you have scrunched and twisted you very gently un-scrunch and un-twist them. This is where you want to be quite careful. They will be all crumpled and twisty. That's good. Leave them that way, place them on a baking sheet and put them in the oven at 225 degrees Fahrenheit for a few minutes to dry them out. Just a few minutes is all it takes, and remember not to walk away from your oven while baking paper. The photo below is of the baked petals. You may be tempted to skip the baking, but it really cements the shape of the crinkled petal and adds even more dimension and texture.

The next step is to take the two small petals and glue them together to form your center bud. You can work with the middle petal, put some glue in the center and scrunch it into a bud like shape before adhering it inside the small outer petal.

Now adhere the 3 medium petals together, staggering the petals and alternating the patterned side with the solid side as demonstrated below.

At this point you are ready to glue in your center bud. It will appear similar to the photo below:

The final step is to adhere the large petal to the bottom. Voila! You now have a finished bloom in colors that will match your project perfectly!

Since my flowers are going out as a gift to a special friend, I added a finishing touch in the way of packaging. I used a couple of the crystal clear A7 card boxes, put a resealable glue dot on the bottom of each flower and adhered them to a coordinating piece of Maja design paper.

Thank you so much for stopping in today and checking out the Friday Focus. It has been a pleasure to share my love of these papers with you. I hope this day brings you joy and lots of crafty inspiration!
Hugs,

 |  |  |  |  |

Nancy, your flowers are gorgeous and you did a great job on this tutorial. Thanks so much for the tip on drying the paper in the oven.
ReplyDeleteJoan
www.joanstouch.com
Thank you so much for sharing this tutorial. Your flowers are beautiful. I can't wait to try this.
ReplyDeleteOh Nancy, these are so pretty and have that beautiful vintage feel I love. Thanks for sharing, must give them a try.
ReplyDeleteThanks for your lovely comment you left me over at Frilly and Funkie.
Julie x
Nicely done Nancy! What I really like is your eye for color, the patterns and colors you mixed together for each flower looks so perfect! Thanks for sharing! xo
ReplyDeleteNancy, they are so gorgeous, thank you so very much for your tutorial, -I don`t have that shaper tool, but will think about something else, to use.-
ReplyDeleteHugs,Dorthe
Gorgeous flowers Nancy! Thanks for sharing your creative process!
ReplyDelete