Wednesday, October 22, 2014

Autumn Wreath


Hello and welcome on this wonderful day! I can't believe it's already time for another exciting challenge at the Frilly and Funky Challenge Blog. My teammate, Rebecca, is our host and her theme is a Grateful Welcome. All you have to do to join in the fun is create an invitation, table decor, decoration for a door or home decor item with gratitude or Thanksgiving theme in mind! 

I designed a cheerful door wreath as a companion to the card I created for the previous challenge. When I contemplate the many things I am grateful for my mother is always at the top of my list. She is the most wonderful, compassionate, and inspirational person I have ever met. I plan to gift these to her as a set for Thanksgiving.      


I found the perfect sentiment in my stamping cabinet. I don't look through the autumn drawer during other times of the year so it's easy to forget what's in there! 


I crafted floral sprays in the rich, warm hues of autumn, accenting with leaves, berries, and frayed cheesecloth. 


Thank you for stopping by today! When I count my blessings you are among them. Your kind words and comments warm my heart and truly mean so much to me. I send wishes for a day filled with all things good and wonderful!

Hugs,         


Other supplies: Grapevine wreath from Hobby Lobby, Flowers from Prima and Wild Orchid Crafts, berries from my stash of autumn supplies, Crafty Ann leaf die

Saturday, October 11, 2014

Blooming Rose Tutorial


Hello and welcome! I'm honored to be presenting the Saturday Step by Step at the Frilly and Funkie Blog on this lovely day. I've shared a couple of flower tutorials in the past and I hope you won't mind if I share just one more. This blooming rose is a flower I use often in my projects and I've had a few special requests for a tutorial on my blog. I started making flowers in 1980 and this technique is a bit of a throwback to the way we created flowers way back then.  


The supplies from the 80's are no longer on the market so I've adjusted my technique over the years, all for the better! Back then paper crafting wasn't the industry that it is today. Options were limited as there were none of the wonderful papers or dies that we use today. We made flowers with pre-made silk rose petals and with one item I really miss; shaped cotton buds on wire stems. I've looked for them everywhere to no avail, hence my own technique to replicate the same style. For this flower I like to use Tim's Tattered Florals die, a star punch, floral wire, and a small wooden craft bead that can be found at any craft store.  


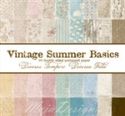
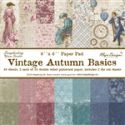
Begin by cutting 5 flower petals and punching one star. I've used my favorite Maja papers; Vintage Summer Basics and Vintage Autumn Basics. Pierce a hole in the center of each petal and the star.  


Take one petal and cut it into six separate pieces.


Lightly moisten each piece by spraying with a water mister then begin shaping each petal. I use shaping tools that have different sized balls on the ends. I used the two smallest tools for these tiny petals. I begin by rubbing the petal with the larger ball tool, gently breaking down the fibers in the paper and adding texture. Next I create a cavity in the side of the paper that I want to use for the inside of the flower by gently pressing into the center with the smaller tool.    


The second petal remains whole, but is shaped in exactly the same method.  


For petals 3 through 5 use a similar process, starting with the side that will be the back of the flower. Continue to moisten, gently rub, and shape each petal. 


Once you've completed the shaping on the back side of the paper, turn it over and press firmly down in the center of what will become the front side of the flower.


Proceed in exactly the same manner with the star punch. 


Below are all the shaped petals you'll need to assemble your flower.


Thread the floral wire through the little wooden craft bead. This will become the center of your flower and provide the base for a perfectly shaped bud. The floral wire stem makes it easy to add the petals and form your flower.   


Begin with the tiny separate petals and use glue to adhere them to the base of the wooden bead one by one. Squeeze the tops of the first four petals and adhere them so they completely cover the top of the bead. The next two petals can be applied a bit more loosely, adhering at just the base and a little way up the side. The photo below is what it will look like when you're finished with the layer of separate petals.        


Next adhere the second petal to the base of your bud. Apply a little adhesive to the sides and loosely form them around your first layer of petals to give the flower the appearance of a gently opening rose.   


Now for the easiest step. Adhere petals 3 through 5 to the base of your bud in an open position, remembering to stagger each layer as you go. 


The last step is to adhere the star punch to the base of your rose to give it a finished look.


I adore creating secret gardens. The photo below is an example of how I've used some of these roses in a past project. Having the wire stem gives you the option of attaching the roses to design your own floral sprays. If you don't wish to use the wire you can easily snip it off with your craft scissors.     


Thanks so much for visiting. I wish you a day filled with blessings and joy! I hope you'll have fun creating a garden full of blooming roses in your own craft room! 

Hugs,


Wednesday, October 8, 2014

Autumn Harvest Card


Hello and happy Wednesday! It's my favorite day!! Wednesday is the day I work as docent at the
Nathaniel Russell House. History has been one of my hobbies since I was a child. It's so much fun to share the beauty of our historic city with visitors from around the world!   

Have you started to feel a bit of chill in the air yet? It's still warm and green in Charleston, but we 
were blessed to travel to Asheville last weekend and had the pleasure of seeing the leaves beginning to change in the mountains of North Carolina. We also enjoyed a wonderful tour of  Biltmore Estate and sampled delicious wines at their winery. Our son turned 21 this year and it was his first time tasting wine. That's him below. He definitely enjoyed the experience! 


My son has been away at college for 3 years now and I still struggle with empty nest syndrome. I ward it off by spending peaceful hours in my craft room. This week I've been happily preparing for another challenge at the Frilly and Funky Challenge Blog! Sue is our hostess and her theme is Autumn Colors. She invites us to celebrate this lovely time of year by creating a project using the gorgeous colors of the season. I'm hoping you'll have time to play along with our challenge! 


The leaves in the Blue Ridge Mountains were in the early stage of change. It was breathtaking to see the transformation that took place in just the few days we were there. It gave me all the inspiration I needed to begin my card. I tried to pull the rich hues of the mountain foliage from my memory and re-create them in my Autumn Harvest card.   


I'm not sure why, but fall fills me with an insatiable urge to bake, especially anything featuring apples or pumpkin. I love the way our home smells when something scrumptious is in the oven. Apple Struesel Coffee Cake is one of our family recipes and a seasonal favorite. Just click on the link above if you want to give it a try! 


I'm so happy you stopped by for a visit! Thank you for sharing your time and friendship with me. Your kind words and comments warm my heart and soul and are truly appreciated. I wish you cozy days of crafting, baking, and memory making! 

Hugs,


I've entered my card in the following challenges:
Craft Hoarders Anonymous
Ruby's Rainbow
Word Art Wednesday
Great Impressions
Inky Impressions
Shopping Our Stash
Crafty Catz
Squigglefly
Crafty Creations Challenges


Other Products Used: Poppy Stamps Trulani Wreath Die, Magnolia Rose Leaf Die, Flowers from Prima and Wild Orchid Crafts,